| |
 |
|
|
|
 |
|
 |
| |
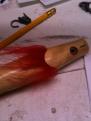
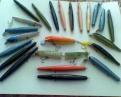
| Rod Building So, you've landed a nice fish on a plug you made, eh? Now, the next step, building your own RODS! |
 |
 07-21-2011, 02:44 AM
|
#1
|
|
Registered User
Join Date: Feb 2010
Location: CT
Posts: 448
|
Hand rod wrapper questions
I recently acquired a free 7' penn guide series rod and it needs a guide replaced. I want to try and fix it myself since I have all the tools and materials necessary to tackle the job except for a hand wrapper (I know I could use a cardboard box and a phone book but I would like to build it out of scrap plywood). Which brings me to my question, about how big should I make the bed of the wrapper? I'd like to make it big enough to possibly handle building a 10' rod at some point in the future. Also would I need a drying setup or could I spin it by hand until the epoxy dries?Thanks
|
|
|

|

|
|
07-21-2011, 06:22 AM
|
#2
|
|
Registered User
Join Date: Jan 2010
Location: S. Easton
Posts: 1,676
|
In the past I've looked up a bunch of different contraptions and really like one out of the bunch. For repairs, I made V cuts in 3 - pieces of PT decking material 12" long (or so) and lined the V cut with felt. Mounted a square piece of the same material to the bottom.
Put the thread in a coffee cup and run the thread through a phone book for tension (if you need more tension add more books). You are the motor that's the only down side.... It works great for repairing rods!!! It packs up really good also!
If you send me your email I'll send you the pics of the rod spinner I like....
ODM
|
"Always two there are, no more, no less: a master and an apprentice." >> Yoda
|
|
|
|
|
07-21-2011, 06:44 AM
|
#3
|
|
Super Moderator
Join Date: Sep 2003
Location: Georgetown MA
Posts: 18,178
|
I've made a grand total of one rod in my life....but this is exactlty how I did it. Guy I know that builds a couple of rods a year showed me how to do it this way. Works real easy
Quote:
Originally Posted by O.D. Mike

In the past I've looked up a bunch of different contraptions and really like one out of the bunch. For repairs, I made V cuts in 3 - pieces of PT decking material 12" long (or so) and lined the V cut with felt. Mounted a square piece of the same material to the bottom.
Put the thread in a coffee cup and run the thread through a phone book for tension (if you need more tension add more books). You are the motor that's the only down side.... It works great for repairing rods!!! It packs up really good also!
If you send me your email I'll send you the pics of the rod spinner I like....
ODM
|
|
"If you're arguing with an idiot, make sure he isn't doing the same thing."
|
|
|
|
|
07-21-2011, 05:24 PM
|
#4
|
|
Registered User
Join Date: Feb 2010
Location: CT
Posts: 448
|
Thanks for the response guys, ODM sent ya a pm
|
|
|
|
|
|
|
07-21-2011, 07:06 PM
|
#5
|
|
Canceled
Join Date: Jun 2003
Location: vt
Posts: 13,069
|
That's how I have repaired rods. I am sure the looks are due to skill not tools and that s why my repairs look like.... but work fine.
|
Frasier: Niles, Ive just had the most marvelous idea for a website! People will post their opinions, cheeky bon mots, and insights, and others will reply in kind!
Niles: You have met people, havent you?
Lets Go Darwin
|

|
|
|
07-21-2011, 08:17 PM
|
#6
|
|
Registered User
Join Date: Jan 2010
Location: S. Easton
Posts: 1,676
|
Hope the pics help!!!!
|
"Always two there are, no more, no less: a master and an apprentice." >> Yoda
|
|
|
|
|
07-22-2011, 05:12 AM
|
#7
|
|
Registered User
Join Date: Feb 2010
Location: CT
Posts: 448
|
Thanks for the pics Mike, gonna start on it this weekend
|
|
|
|
|
|
|
07-22-2011, 07:12 AM
|
#8
|
|
Registered User
Join Date: Jul 2004
Location: Buxton, Maine
Posts: 1,727
|
This is what makes this site so great. Loads of free info given just to help out other people.Way to go John and all those that post just to help out. Ron
|
|
|
|
|
|
|
07-22-2011, 12:55 PM
|
#9
|
|
Registered User
Join Date: Jan 2010
Location: S. Easton
Posts: 1,676
|
Quote:
Originally Posted by Ryan560
Thanks for the pics Mike, gonna start on it this weekend
|
Show some progress pics please..... If you need anything shoot me a PM!  |
"Always two there are, no more, no less: a master and an apprentice." >> Yoda
|
|
|
|
|
07-26-2011, 06:28 PM
|
#10
|
|
Registered User
Join Date: Feb 2010
Location: CT
Posts: 448
|
Didn't get a chance to mess with this over the weekend besides collecting some parts, but made some progress today. Gonna go a different route than the pics you sent Mike, I don't really have enough room or scrap wood to build a longer bed so for now I'm building something similar to this picture but I'll have two separate supports and a motor on a stand. The beds about 2-1/2' long and the supports to hold the rod are 7" high off the bed.. Haven't assembled it all yet but I'll take pictures and post when it's completed.
|
|
|
|
|
|
|
07-30-2011, 09:06 PM
|
#11
|
|
Registered User
Join Date: May 2003
Location: Portsmouth RI
Posts: 227
|
V notch in 1 by 3 make 2 or 3 of them
|
|
|
|
|
|
08-04-2011, 09:26 AM
|
#12
|
|
Registered User
Join Date: Jan 2010
Location: S. Easton
Posts: 1,676
|
Quote:
Originally Posted by Ryan560
Didn't get a chance to mess with this over the weekend besides collecting some parts, but made some progress today. Gonna go a different route than the pics you sent Mike, I don't really have enough room or scrap wood to build a longer bed so for now I'm building something similar to this picture but I'll have two separate supports and a motor on a stand. The beds about 2-1/2' long and the supports to hold the rod are 7" high off the bed.. Haven't assembled it all yet but I'll take pictures and post when it's completed.
|
I like the looks of this... Can't wait to see how yours comes out!!!! |
"Always two there are, no more, no less: a master and an apprentice." >> Yoda
|
|
|
|
|
08-23-2011, 04:20 PM
|
#13
|
|
Registered User
Join Date: Feb 2010
Location: CT
Posts: 448
|
Kinda ran outta steam on this project. It's on the back burner for now, as I'm working on a few batches of plugs for fall. This is as far as I got with it, still have to gather some parts.
|
|
|
|
|
|
|
08-23-2011, 06:49 PM
|
#14
|
|
Registered User
Join Date: Jan 2010
Location: S. Easton
Posts: 1,676
|
That looks great!!! Can't wait to see it finished!!!
|
"Always two there are, no more, no less: a master and an apprentice." >> Yoda
|
|
|
|
|
08-23-2011, 08:19 PM
|
#15
|
|
Registered User
Join Date: May 2009
Location: Somerset Ma
Posts: 1,706
|
I still don't have the nutz to start wrapping rods. Just something else to get obsessed with.
|
|
|
|
|
|
|
08-24-2011, 02:54 AM
|
#16
|
|
Registered User
Join Date: Jan 2010
Location: S. Easton
Posts: 1,676
|
Quote:
Originally Posted by Hookedagain
I still don't have the nutz to start wrapping rods. Just something else to get obsessed with.
|
Try repairing an old rod first, it takes practice like anything else. Once you do it a couple of times, you'll get the hang of it and build a surf rod.....  |
"Always two there are, no more, no less: a master and an apprentice." >> Yoda
|
|
|
|
|
08-24-2011, 10:51 AM
|
#17
|
|
Registered User
Join Date: May 2000
Location: Cumberland,RI
Posts: 8,555
|
Although it seems opposite, it much easier to build new than to repair old.
For a 10 footer, I would like the v stand 8 feet apart with 4 total v stands.
Turning by hand just adds time. You can do just as nice a job by hand as with a power wrapper.
|
Saltheart
Custom Crafted Rods by Saltheart
|
|
|
|
|
08-26-2011, 07:36 AM
|
#18
|
|
Registered User
Join Date: Dec 2002
Location: North Branford,Ct.
Posts: 7,580
|
Question? First nice start on your wrapper. What do you use to support the tip when wrapping a decorative wrap in front of tip?
|
Billy D.
|
|
|
|
|
08-26-2011, 10:49 AM
|
#19
|
|
Registered User
Join Date: May 2000
Location: Cumberland,RI
Posts: 8,555
|
I usually have a stand about 8 inches down from tip. I wrap using thread bobbins so I can use the othe hand if needed to prop up tip. You are not using a lot of tension so the close stand should be all you need.
|
Saltheart
Custom Crafted Rods by Saltheart
|
|
|
|
|
09-13-2011, 07:16 AM
|
#20
|
|
Registered User
Join Date: Jan 2010
Location: S. Easton
Posts: 1,676
|
[QUOTE=Saltheart;882512]Although it seems opposite, it much easier to build new than to repair old.
So its easier putting a cork or foam handle, reel seat, all the guides and lining them up, applying the thread, epoxying them and let them turn for a couple of hours than,
stripping off one broken guide, cleaning the area, lining up one guide, , applying thread, epoxying and turn until dry....
 |
"Always two there are, no more, no less: a master and an apprentice." >> Yoda
|
|
|
|
|
09-13-2011, 10:24 AM
|
#21
|
|
Registered User
Join Date: May 2000
Location: Cumberland,RI
Posts: 8,555
|
Quote:
Originally Posted by O.D. Mike
Try repairing an old rod first, it takes practice like anything else. Once you do it a couple of times, you'll get the hang of it and build a surf rod..... |
I guess I read "Try repairing an old rod first " as suggesting repairing a whole other old rod, different from "the rod" with one bad guide he initially mentioned. Sorry for the misinterpretation. |
Saltheart
Custom Crafted Rods by Saltheart
|
|
|
|
|
09-13-2011, 03:15 PM
|
#22
|
|
Registered User
Join Date: Jan 2010
Location: S. Easton
Posts: 1,676
|
Quote:
Originally Posted by Saltheart
I guess I read "Try repairing an old rod first " as suggesting repairing a whole other old rod, different from "the rod" with one bad guide he initially mentioned. Sorry for the misinterpretation.
|
Ok,
Reading it like that, I totally agree!!!!  |
"Always two there are, no more, no less: a master and an apprentice." >> Yoda
|
|
|
|
|
09-13-2011, 04:43 PM
|
#23
|
|
Registered User
Join Date: May 2000
Location: Cumberland,RI
Posts: 8,555
|
Many rodbuilders say grinding guide feet on on new guides is their least liked activity but for me , I think stripping off old guides and reel seats is the pits. You got to be so careful not to nick the blank and abrasive things like cutting wheels and sandpaper make such a mess with dust flying everywhere. I hate dust in my building area. It seems to sprout wings to get to new finish while it cures.  |
Saltheart
Custom Crafted Rods by Saltheart
|
|
|
|
|
09-14-2011, 09:26 PM
|
#24
|
|
Registered User
Join Date: Aug 2011
Location: Cape Cod
Posts: 91
|
nice
|
|
|
|
|
|
|
 Posting Rules
|
You may not post new threads
You may not post replies
You may not post attachments
You may not edit your posts
HTML code is Off
|
|
|
All times are GMT -5. The time now is 02:43 PM.
|
| |


 Linear Mode
